Use AI Connectors With Claude Desktop
You can integrate ThinkAutomation with the Claude Desktop application, allowing Claude to securely access data and actions exposed through ThinkAutomation AI Connector (MCP) message sources.
The AI Connector message source enables ThinkAutomation to act as a Model Context Protocol (MCP) server. This allows external AI providers such as Claude to securely execute automations on demand, allowing the AI to request context information for specific items when it needs it, or perform custom workflow actions (such as creating a support ticket). The Ask AI automation action automatically supplies MCP information when it makes calls to the AI. However, you can also use the MCP endpoints directly on any client that supports MCP (such as Claude Desktop).
This enables you to create automations within ThinkAutomation that Claude can automatically call whenever additional information is required to answer a user question.
For example:
- You create a Get Quote Details AI Connector message source in ThinkAutomation.
- The associated automation retrieves quotation documents from the local file system, converts them to plain text and returns the contents.
- The MCP server information is added to the Claude Desktop configuration file.
- When a user asks Claude a question such as "What is the value of quotation 1234?", Claude automatically calls the ThinkAutomation AI Connector to retrieve the information before answering.
Multiple AI Connector message sources can be exposed to Claude Desktop. You can use a shared local MCP URL so multiple Claude Desktop users on your network can access a central ThinkAutomation Server, or you can use the public MCP URL for remote access.
Step 1: Create An AI Connector Message Source
Use the ThinkAutomation Studio to create a new AI Connector Message Source. For this example we will create an automation that retrieves quotation data from the local file system.
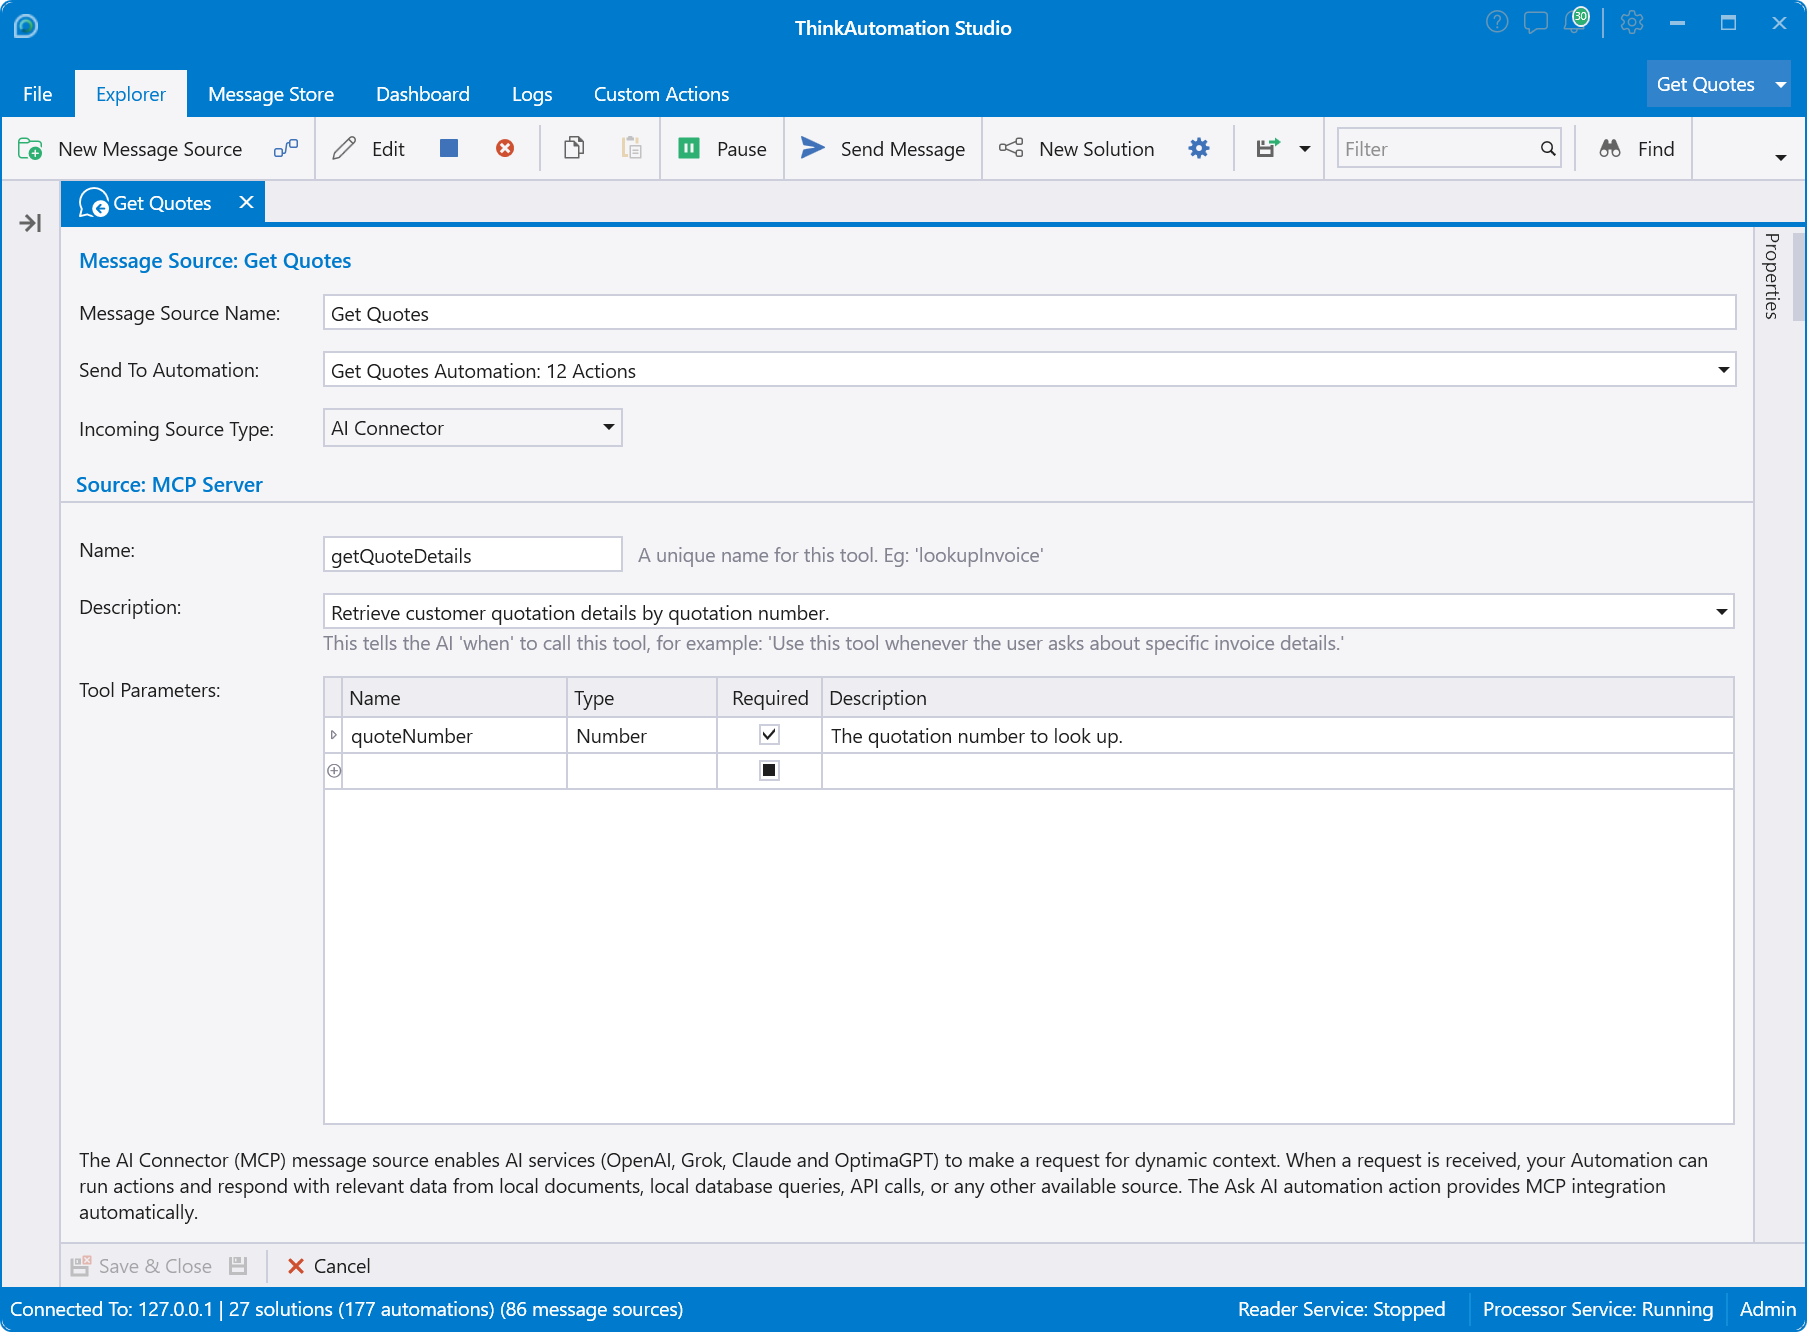
Enter the Name. This must be unique for all AI Connector message sources within a solution. For example: 'getQuoteDetails', 'getinvoice' or 'serviceStatus'.
The Description should be a clear instruction to the AI on how it should use this tool. The description is important as it tells the AI when to make a call to this message source.
For example:
Use this tool whenever the user asks about quotations.
Always use this tool before answering quotation related questions.
One or more parameters can be defined. Each parameter has a Name, Type and Description. When a user asks the AI a question and the AI has decided it needs to call this tool, the parameter values will be automatically obtained by the AI and will be available in your automation.
In this example we will have a single parameter:
- Name: quoteNumber
- Type: Number
- Required: True
- Description: The quotation number to lookup.
When a user asks the AI a question such as 'What is the value for quotation 5678'. The '5678' value will be passed to your automation - ready for you to obtain the data and return it.
Step 2: Create The Automation
We now need to create the ThinkAutomation automation that will execute when the AI makes a call to this AI Connector message source:
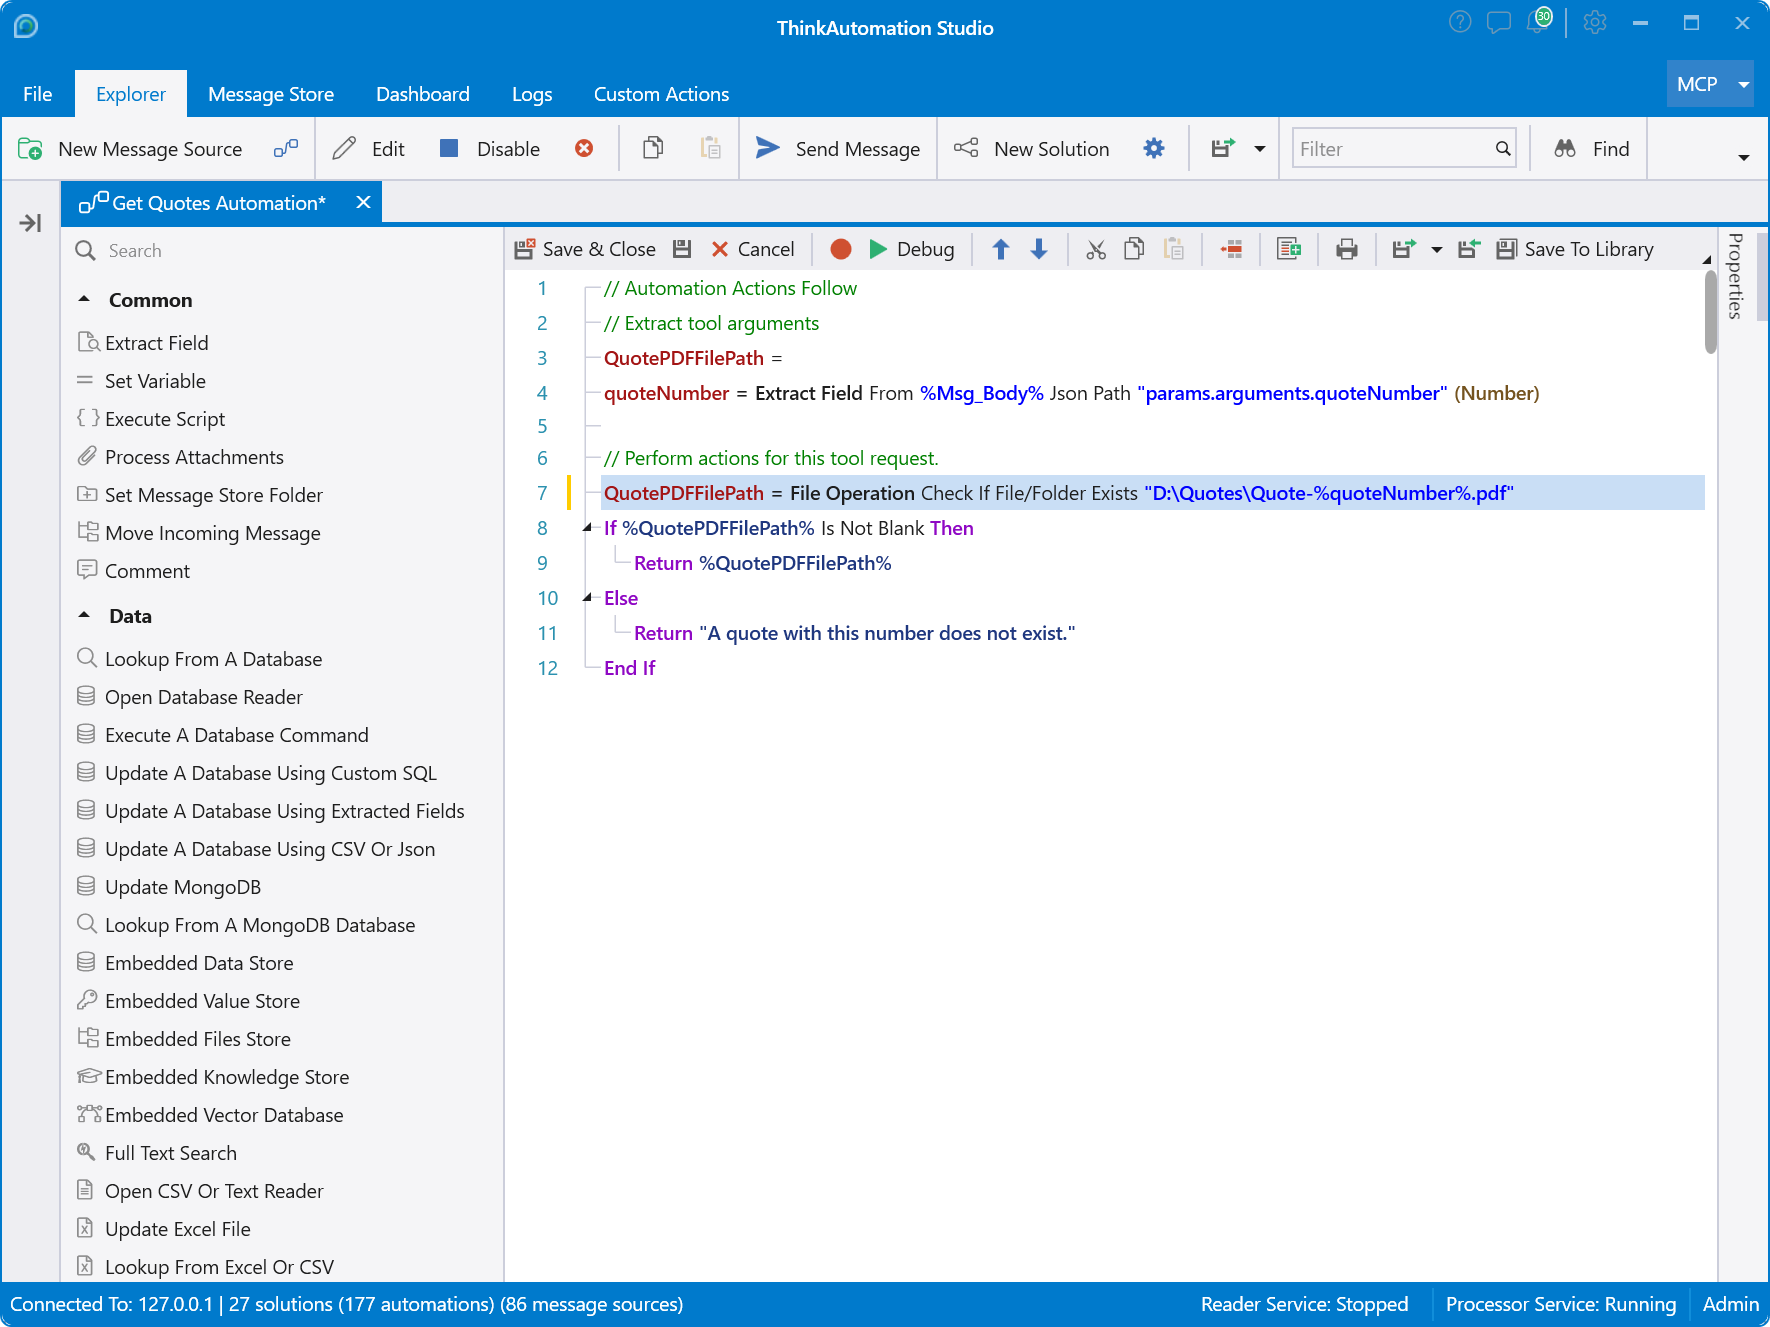
The parameter values will be automatically extracted from the values passed by the AI.
In the above example, we are simply using the extracted quoteNumber to check if a quote file exists on the local file system. If it does, the file is returned, otherwise we return 'A quote with this number does not exist'.
Info
For Ai Connector message sources, ThinkAutomation will automatically convert document contents to text before returning the content to the AI.
Your automation can perform any actions required to retrieve or generate information, including:
- Reading local databases
- Reading local or network documents
- Calling external APIs
- Accessing business systems
- Sending emails or notifications
- Querying internal services
- Returning dynamically generated content
Note
You can add multiple AI Connector Message Sources/Automations to the same ThinkAutomation Solution. All of these will then be available to Claude for different tasks/information sources.
Step 3: Install Node.js
Claude Desktop uses a small MCP bridge application to communicate with remote MCP servers. This bridge is started using npx, which is included with Node.js.
Node.js must therefore be installed on any computer running Claude Desktop.
Download and install the current LTS version of Node.js from:
https://nodejs.org/
After installation, open Command Prompt and verify that Node.js is installed correctly:
node -v
npm -v
npx -v
Step 4: Integrate With Claude Desktop
Claude Desktop must be installed. Claude Desktop can be installed on the same computer as your ThinkAutomation Server, or on multiple computers on the same network.
Method 1: Use ThinkAutomation To Update The Claude Configuration File
1 - In the ThinkAutomation Studio, open the Solution properties page.
2 - Select the MCP URL tab.
3 - In the Claude Desktop Integration box, select Integrate With Claude Desktop - Add Using Local URL:
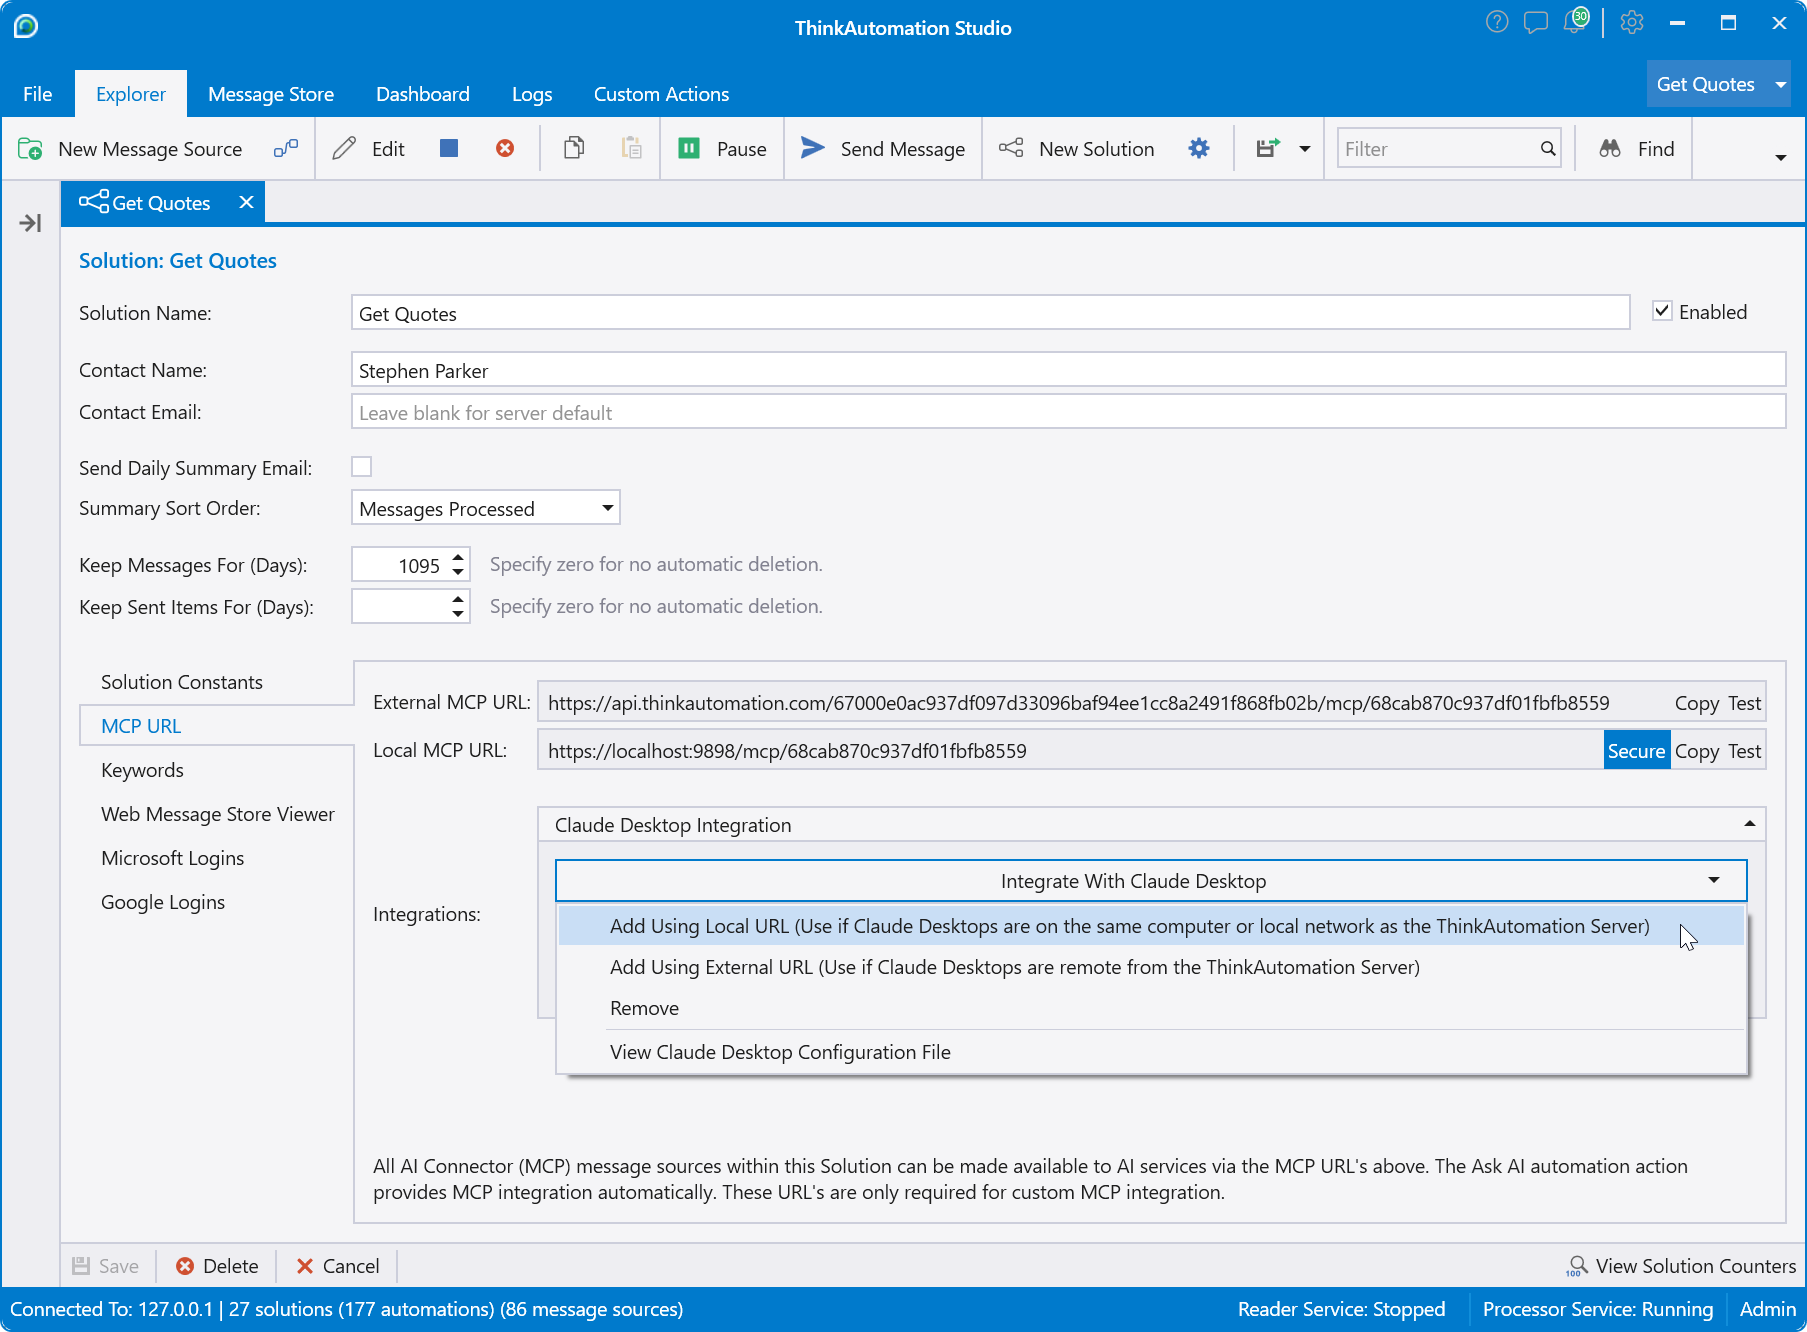
This will add the MCP URL for the selected Solution to the Claude Desktop configuration file.
4 - Restart Claude Desktop (you will need to close the system tray icon also).
Method 2: Update The Claude Configuration File Manually
1 - Open the Claude Desktop configuration file claude_desktop_config.json using a text editor.
Tip
If the configuration file does not already exist, open Claude Desktop and navigate to File > Settings > Developer and click Edit Config. Claude Desktop will create the file automatically.
2 - Add the following:
"mcpServers": {
    "thinkautomation": {
      "command": "npx.cmd",
      "args": [
        "mcp-remote@latest",
        "{local mcp url}",
        "--header",
        "Authorization: Bearer {token}"
      ]
    }
  }
where:
thinkautomation is the connector name you want this ThinkAutomation Solution to appear as within Claude Desktop.
{local mcp url} is the Local MCP URL shown on the ThinkAutomation Solution Properties - MCP tab. This URL is shared by all AI Connector message sources within the same solution - so only needs to be added once. If you are using Claude Desktop on multiple computers within your network, then change 'localhost' to the IP address/dns name of the ThinkAutomation Server computer and ensure port 9899 is open on the ThinkAutomation firewall.
You must use the non-secure URL unless you have assigned a trusted SSL certificate to ThinkAutomation, as Claude Desktop does not support self-signed certificates. However, the call from Claude Desktop to ThinkAutomation is performed locally, so does not need to be secure.
{token} is the Authentication Token from your ThinkAutomation Server Settings - AI Providers - AI Connector.
3 - Save the file.
4 - Restart Claude Desktop (you will need to close the system tray icon also).
Step 5: Verify The Connection
ThinkAutomation is now integrated with Claude Desktop and thinkautomation appears in the Claude Desktop app in Customize - Connectors:
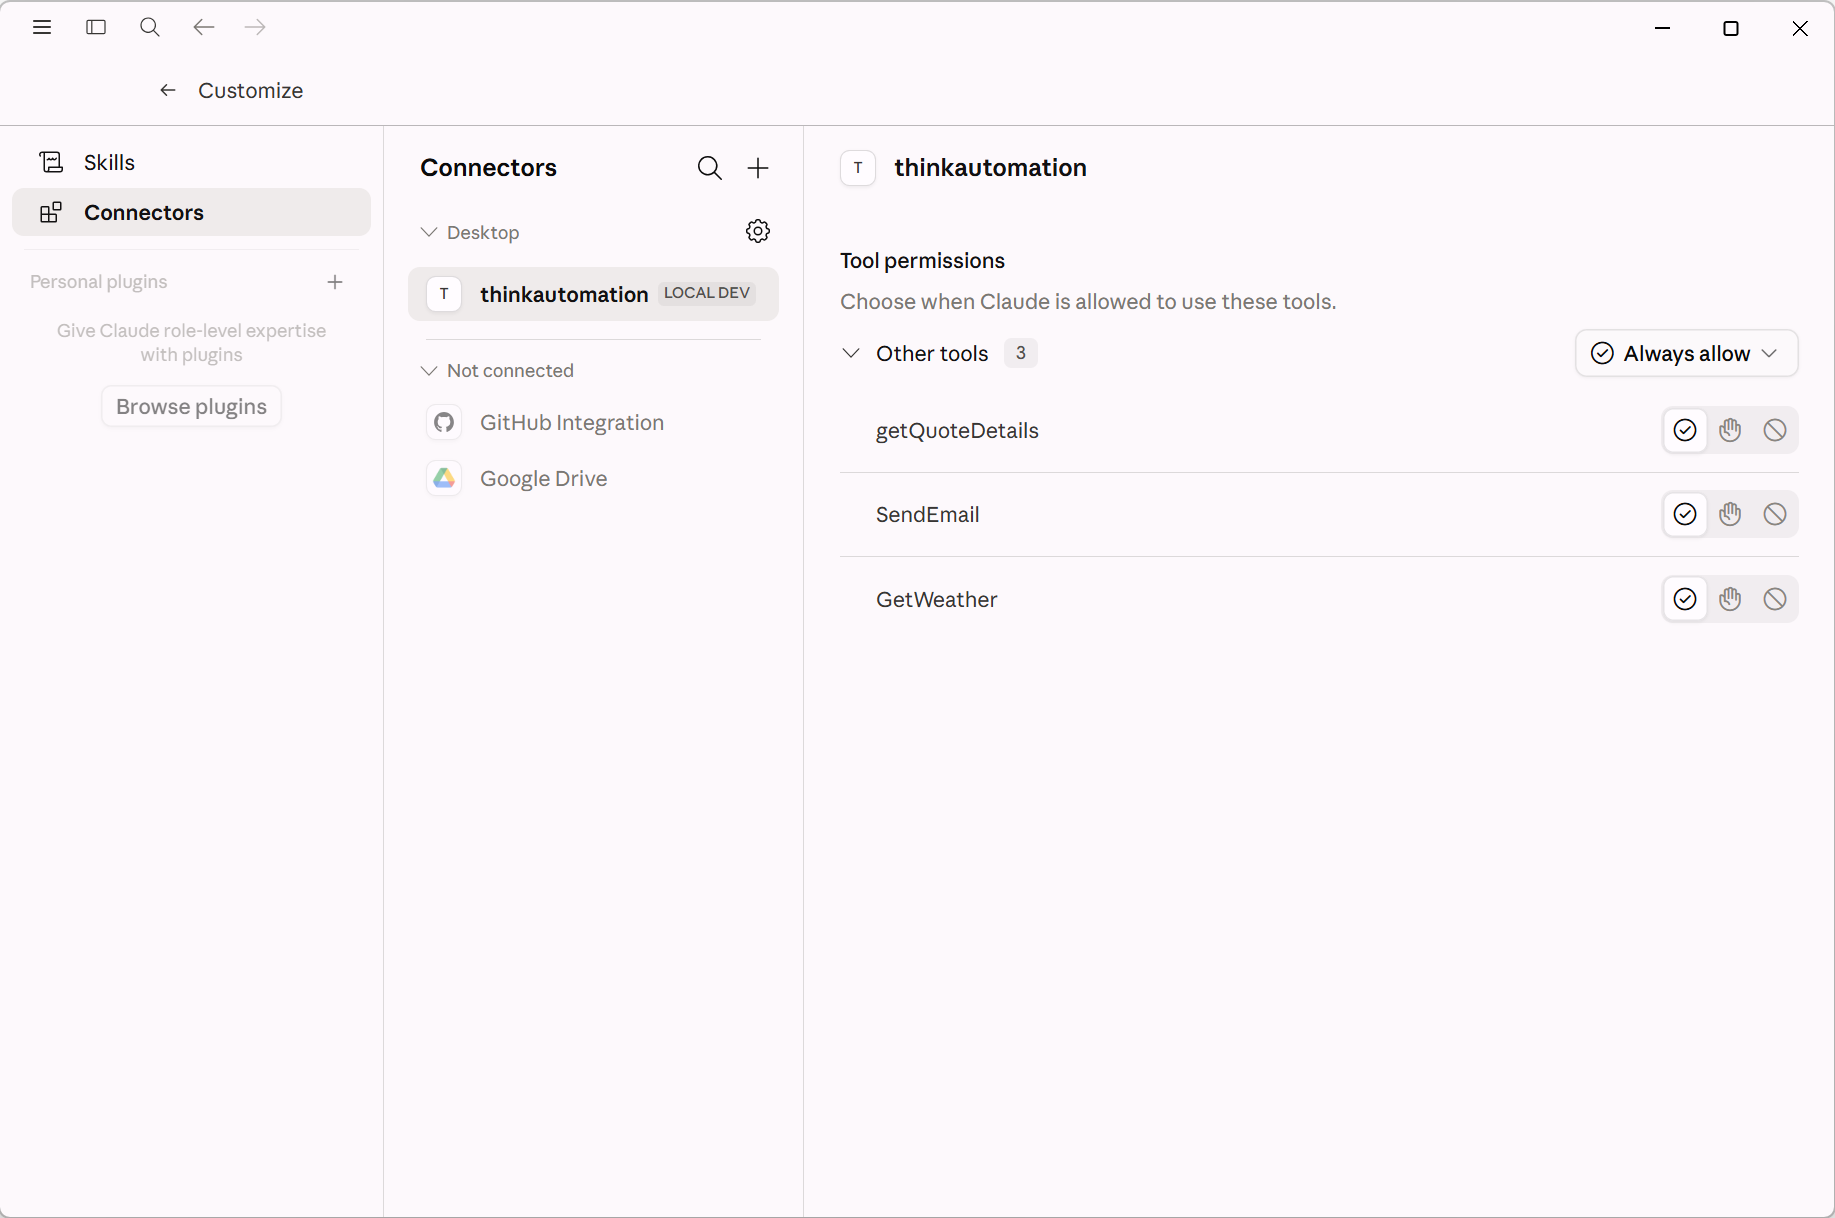
Enable the Always allow option on each tool (if this is not available, Claude Desktop will ask for permission to use the tool).
You can now ask Claude what tools it has available:
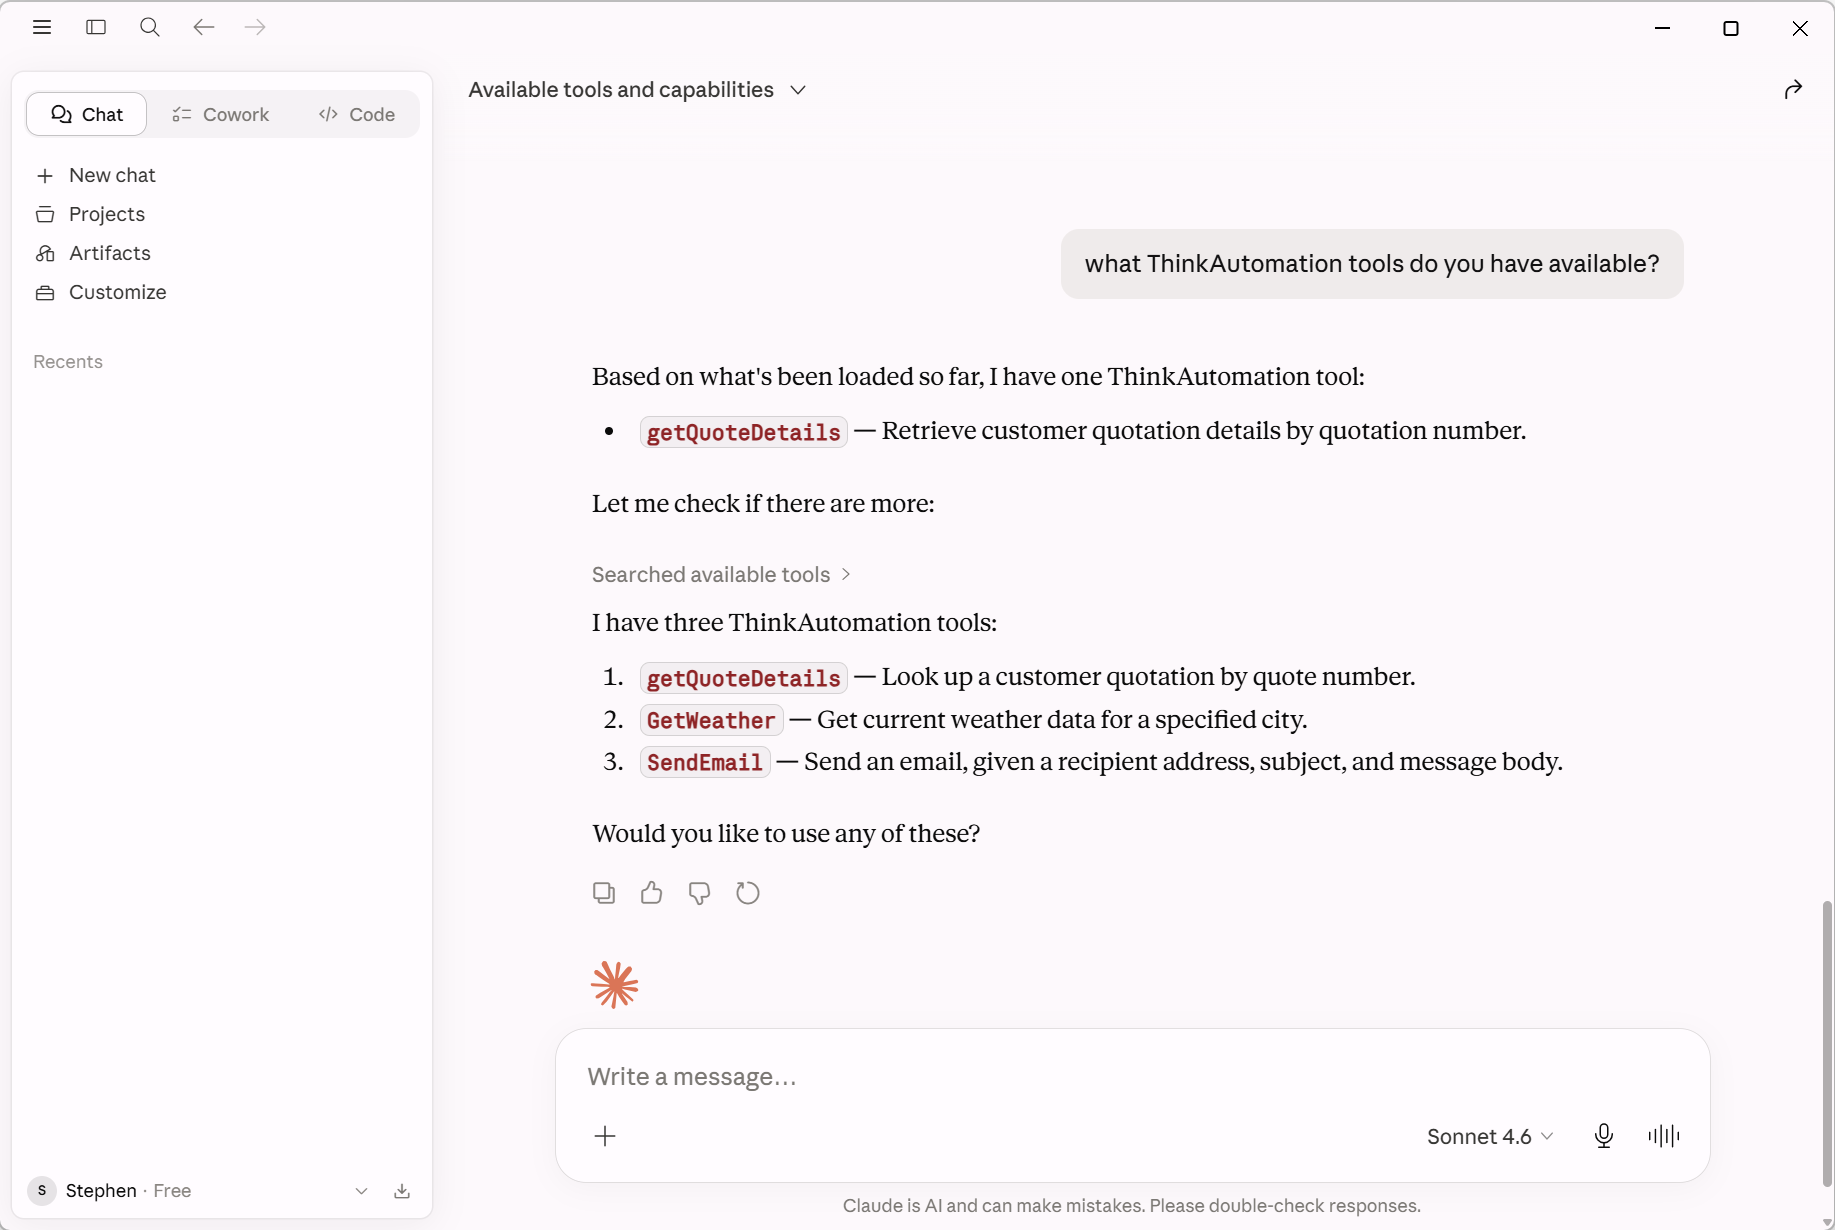
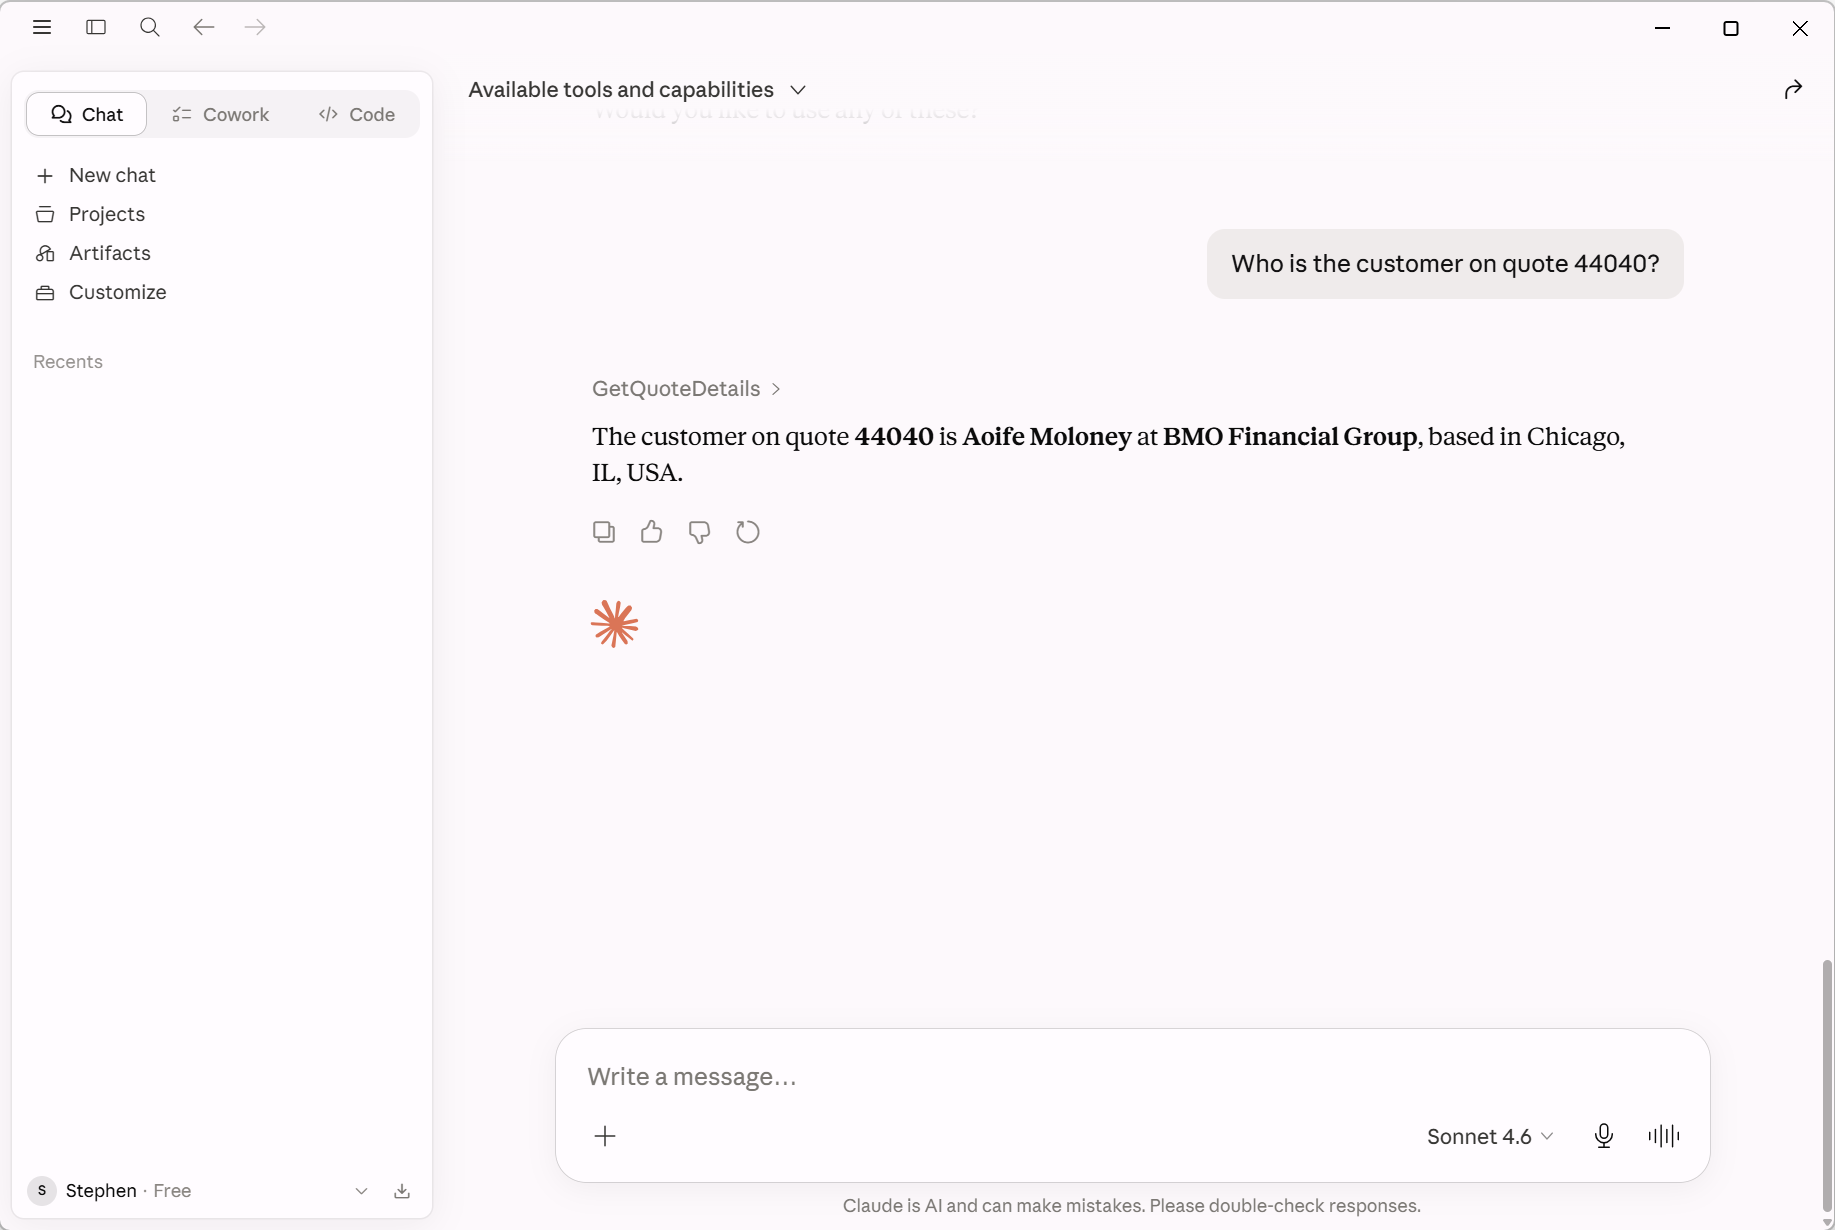
And you can ask about specific quotations: